Best Kilimanjaro acclimatization Join with Friends
- Trip Overview
- Trip Itinerary
What's included
Marangu Route 4 Days Photography Tour
Overview
The 4-Day Marangu Route Photography Tour combines a challenging Kilimanjaro trek with opportunities to capture the mountain’s changing landscapes, wildlife, vegetation, volcanic formations, and summit scenery.
Starting from the southeastern side of Mount Kilimanjaro, the journey passes through dramatically different environments, from the lush montane rainforest to the open heath and moorland, alpine desert, and high-altitude summit zone. This changing scenery makes the route particularly interesting for photographers who want to document the mountain as a complete ecological journey.
The tour is designed for travelers who want to experience Kilimanjaro while creating a visual record of the landscape, natural environment, trekking experience, and summit achievement. Photography opportunities occur throughout the route, with particularly memorable scenes around the forest, Mawenzi and Kibo peaks, the Saddle, and the summit at sunrise.
Photography Highlights
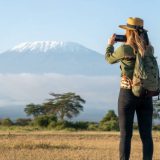
The Marangu Route offers a wide variety of subjects and environments to photograph, including:
-
Lush montane rainforest
-
Moss-covered trees and ferns
-
Mountain flowers and highland vegetation
-
Monkeys and forest birds
-
Mist moving through the forest
-
Heath and moorland landscapes
-
Giant heathers
-
Mawenzi Peak
-
Kibo Peak
-
The Saddle between Mawenzi and Kibo
-
Volcanic rocks and alpine desert
-
Mountain huts and trekking scenes
-
Clouds beneath the mountain
-
Summit landscapes
-
Sunrise at Uhuru Peak
-
Trekking companions and support crew
Photography Experience
The biggest photographic attraction of Marangu is the dramatic change in scenery with altitude. A single journey can produce photographs ranging from dense green tropical forest to barren volcanic landscapes and cold summit terrain.
The forest provides rich colors, textures, shadows, and wildlife subjects, while the upper mountain offers wide panoramic compositions with fewer distractions. This contrast gives photographers the opportunity to create a diverse collection of images from one trek.
Best Photography Locations
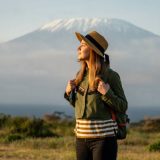
Montane Rainforest
The rainforest is ideal for close-up nature photography and atmospheric images. Look for textures, leaves, moss, tree trunks, flowers, wildlife, and shafts of sunlight passing through the canopy.
Mandara Area
The surroundings of Mandara provide opportunities for forest landscapes and photographs of trekkers interacting with the mountain environment.
Horombo Area
Horombo offers more open views and excellent opportunities to photograph Mawenzi Peak, particularly when clouds clear around the mountain.
The Saddle
The Saddle is one of the most striking landscape locations on the route. Its open terrain allows photographers to capture the enormous scale of the landscape between Mawenzi and Kibo.
Kibo Area
The barren volcanic landscape around Kibo creates a dramatic contrast with the forest encountered earlier. Wide-angle lenses are useful for emphasizing the scale of the terrain.
Uhuru Peak
The summit is the ultimate photographic destination. Sunrise, summit signs, crater landscapes, clouds below the mountain, and portraits of fellow trekkers can all provide memorable images.
Wildlife Photography
The lower forest provides the greatest opportunity for wildlife photography. Possible sightings include black-and-white colobus monkeys, blue monkeys, birds, butterflies, and other small animals.
Wildlife photography should always follow park regulations. Do not approach, feed, or disturb animals for a photograph.
Photography and Safety
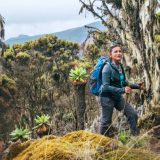
The mountain trek must always come before photography.
Photographers should:
-
Keep equipment lightweight.
-
Avoid stopping in dangerous or exposed areas.
-
Follow the guide’s instructions.
-
Keep both hands available when necessary.
-
Avoid spending excessive time in cold conditions.
-
Protect batteries from extreme cold.
-
Secure cameras and lenses against drops.
-
Stop photographing when weather conditions become unsafe.
-
Never leave the designated trail for a better photograph.
At high altitude, fatigue and reduced oxygen can affect concentration, so simple and efficient photography techniques are preferable.
Best Time for the Photography Tour
The generally drier periods are often preferred for Kilimanjaro photography because clearer conditions can provide better mountain views.
-
January–March: Generally drier, with colder conditions near the summit.
-
June–October: Generally dry and popular for trekking.
-
November–December: Short rains can occur.
-
April–May: Wetter conditions associated with the long rains.
Clouds and changing weather are not necessarily undesirable for photography; they can create atmospheric and dramatic images. However, clear conditions are particularly valuable for long-distance views of the mountain
Frame Kilimanjaro, One Shot at a Time
The Marangu Route 4 days photography tour combines adventure, comfort, and creative freedom on Mount Kilimanjaro. With expert guidance, hut accommodation, and photography-friendly pacing, this trek allows travelers to capture Kilimanjaro’s landscapes while enjoying a safe and structured climb.
For photographers seeking a visually rich, well-supported Kilimanjaro experience, this 4-day photography tour delivers unforgettable moments both on the trail and through the lens.
Book this Tour with Kilinge Adventures
Apart from this, you may read and write some reviews for us from Safari Bookings.
Also, you may read and write reviews for us from TripAdvisor
- Day 1
- Day 2
- Day 3
- Day 4
Marangu Gate – Mandara Hut
The photography journey begins at Marangu Gate, where you complete registration before entering the mountain environment.
The first section passes through the montane rainforest, offering some of the richest photographic opportunities of the trek. Look for interesting patterns in leaves, moss, tree trunks, ferns, flowers, and filtered light beneath the forest canopy.
Wildlife such as monkeys and birds may also provide opportunities for nature photography, although sightings are not guaranteed.
As the trail climbs toward Mandara Hut, the forest gradually changes and the light becomes an important part of the landscape.
Photography subjects: Forest, vegetation, wildlife, trail scenes, trekking portraits Distance: Approximately 8 km Trekking time: 3–4 hours Elevation: Approximately 1,860 m → 2,700 m Overnight: Mandara Hut
Mandara Hut – Horombo Hut
The second day takes you from rainforest into heath and moorland, creating a significant visual change.
The open landscape provides wider compositions, with distinctive high-altitude vegetation and impressive views of Mawenzi and Kibo when weather conditions are favorable.
This is a good day for landscape photography because the trail becomes more exposed and the surrounding mountain scenery becomes increasingly visible.
Photography subjects: Mountain panoramas, Mawenzi, Kibo, highland plants, trekking portraits , clouds Distance: Approximately 11 km Trekking time: 5–7 hours Elevation: Approximately 2,700 m → 3,720 m Overnight: Horombo Hut
Horombo Hut – Kibo Hut
The landscape becomes increasingly stark as you leave the moorland and cross the Saddle, the broad alpine area between Mawenzi and Kibo.
The lack of dense vegetation creates opportunities for minimalist landscape photography, wide-angle compositions, and photographs emphasizing the scale of the mountain.
Kibo Peak dominates the landscape as you approach Kibo Hut. Because the next day's summit attempt begins very early, photographers should organize and protect their equipment before resting.
Photography subjects: Kibo Peak, Mawenzi Peak, volcanic terrain, alpine desert, wide landscapes, trekking silhouettes Distance: Approximately 9–10 km Trekking time: 5–7 hours Elevation: Approximately 3,720 m → 4,700 m Overnight: Kibo Hut
Kibo Hut – Uhuru Peak – Descent
The final photography day begins during the night. The ascent toward the summit provides opportunities to photograph headlamps winding up the mountain, silhouettes, stars when skies are clear, and the gradual transition from darkness to dawn.
As you approach the crater rim and Uhuru Peak, the first light of sunrise can create dramatic colors across the volcanic landscape.
At 5,895 metres, Uhuru Peak provides the ultimate photographic achievement of the journey. After taking summit photographs, begin the long descent toward the lower mountain.
Photography subjects: Night trekking, headlamp trails, sunrise, crater rim, summit landscapes, clouds below the mountain, summit portraits Summit: Uhuru Peak – 5,895 m Summit ascent: Approximately 6–8 hours Descent: Several additional hours